
DIY 3D Paper Snowflake 11 Steps (with Pictures) Instructables
Step 1: Preparing the Square Paper You will need to prepare 6 pieces of square sheets. You can use the store-bought square paper set for this craft or you can use a ruler and pencil to trace and cut out square sheets from the papers available at your home. To craft 1 snowflake we need 6 square sheets. Take any one of the square sheets at first.
How to Make an Easy 3D Paper Snowflake
Step 1: Cut Out Six Squares of the Same Size. Using a ruler to evenly measure the lengths, cut out six squares of paper that are identical in size. These are four-inch papers, but the size can be altered depending on your desired size of snowflake. Step 2: Fold Square and Triangle in Half Diagonally. Fold square in half diagonally.
Craft for fun How to Make a 3D Paper Snowflake
Step 1: cut and fold 6 pieces of square paper Let's start with the first design. You will need 6 small square pieces of paper for each 3D snowflakes. We used 6 small pieces of squares cut from 8.5″ x 11″ white copy paper, with 4 small squares on each sheet as shown in photo below. Pin it! Get Our Top Secrets!
How to Make 3D Snowflakes At Home In Love
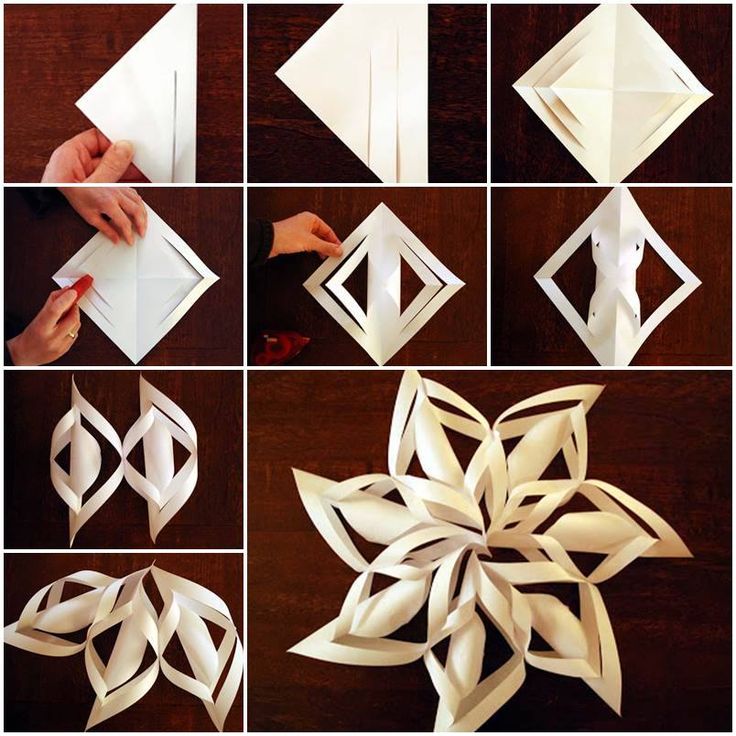
Glue. 1. Make a Square. Take a sheet of paper and fold one of the corners to the other side and align the edges. Cut off the excess paper so you are left with just the triangle shape. 2. Cut the Lines. Cut a line from the folded edge of the paper, parallel up to the tip of the triangle.

How to Make a 3D Paper Snowflake 13 Steps (with Pictures)
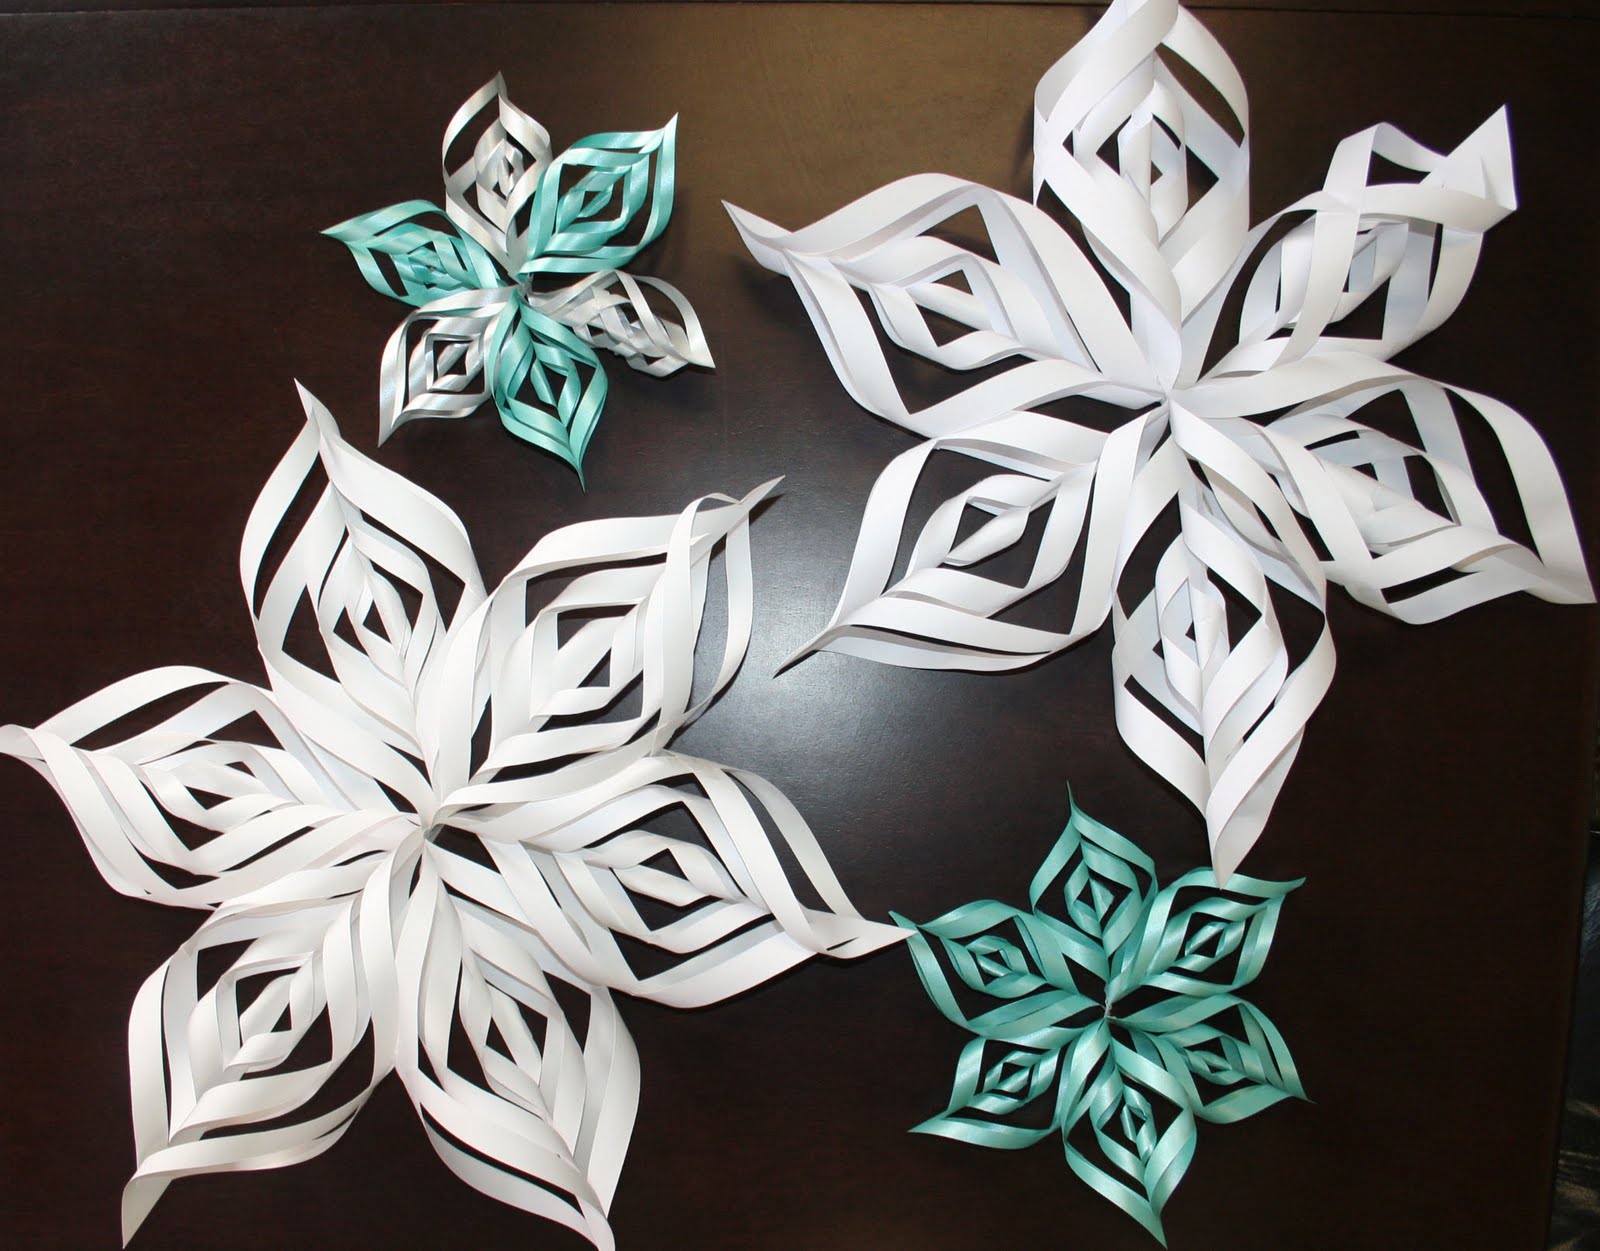
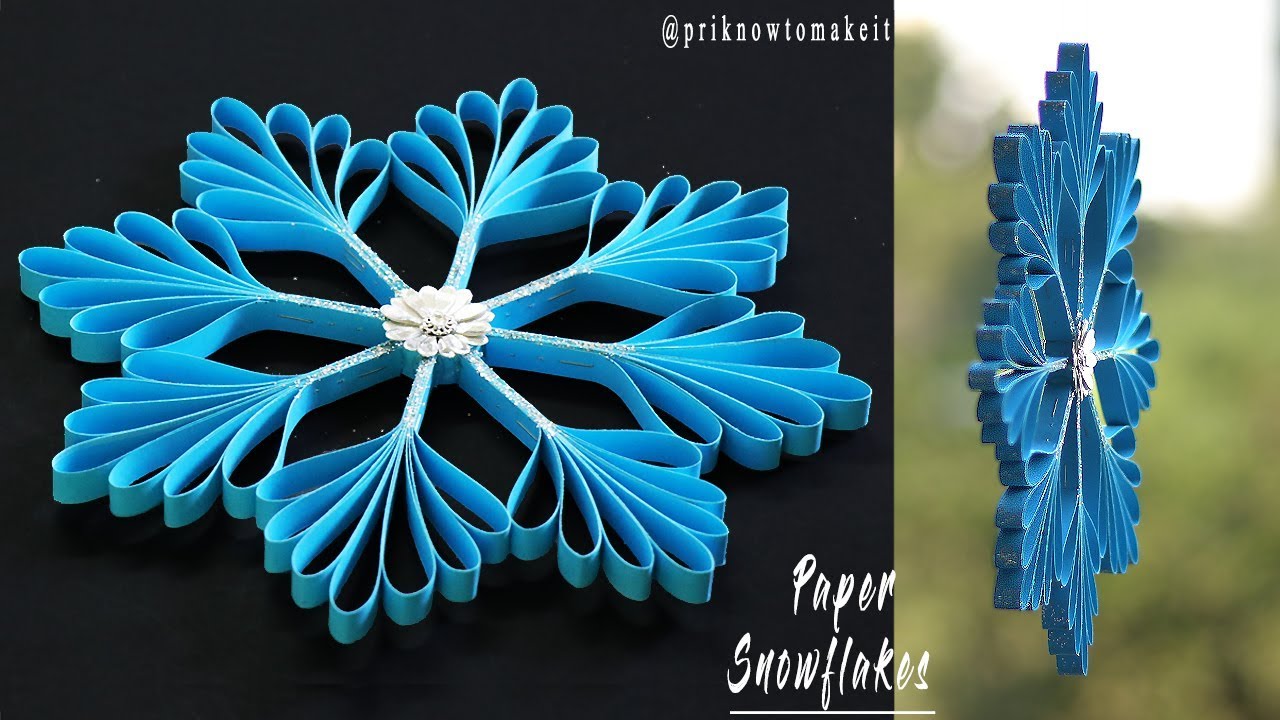
You can try this one with different colored papers - the outcome is sure to be flowery. 3D Paper Snowflake Step by Step DIY 3D Paper Snowflakes A simple one really, just a few added folds in the paper can turn an ordinary snowflake into something so amazing. Make 3D Paper Snowflakes 3D Origami Snowflake Tutorial Instruction for Beginners
3D Snowflake Paper snowflake How to Make 3D Paper Snowflakes for
STEPS Method 1 : Making a 3D Snowflake Without a Template 1 Make 6 identical squares. Prepare 6 squares of equal size using blue, white, or silver plain or patterned paper. Follow this size guide for deciding how big you want your snowflake to be: 3" squares = 7.5" snowflake 3.5" squares = 9" snowflake 4.25" squares = 11" snowflake

How to Make a 3D Paper Snowflake 12 Steps (with Pictures)
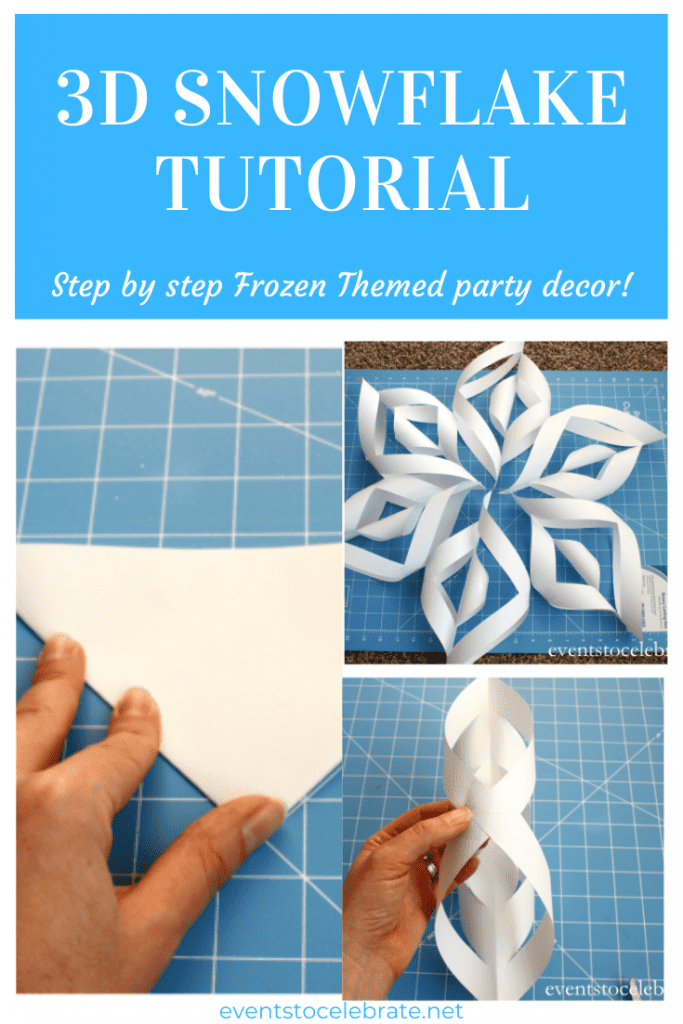
The first step to making your 3D paper snowflakes is to create a square out of your paper. If you're using regular printer paper, like I did, you'll simply fold the top, shorter edge over to meet the longer, perpendicular edge of the paper. This creates a nice, even triangle at the top of the page.

12 Easy 3D Paper Snowflake Patterns Guide Patterns
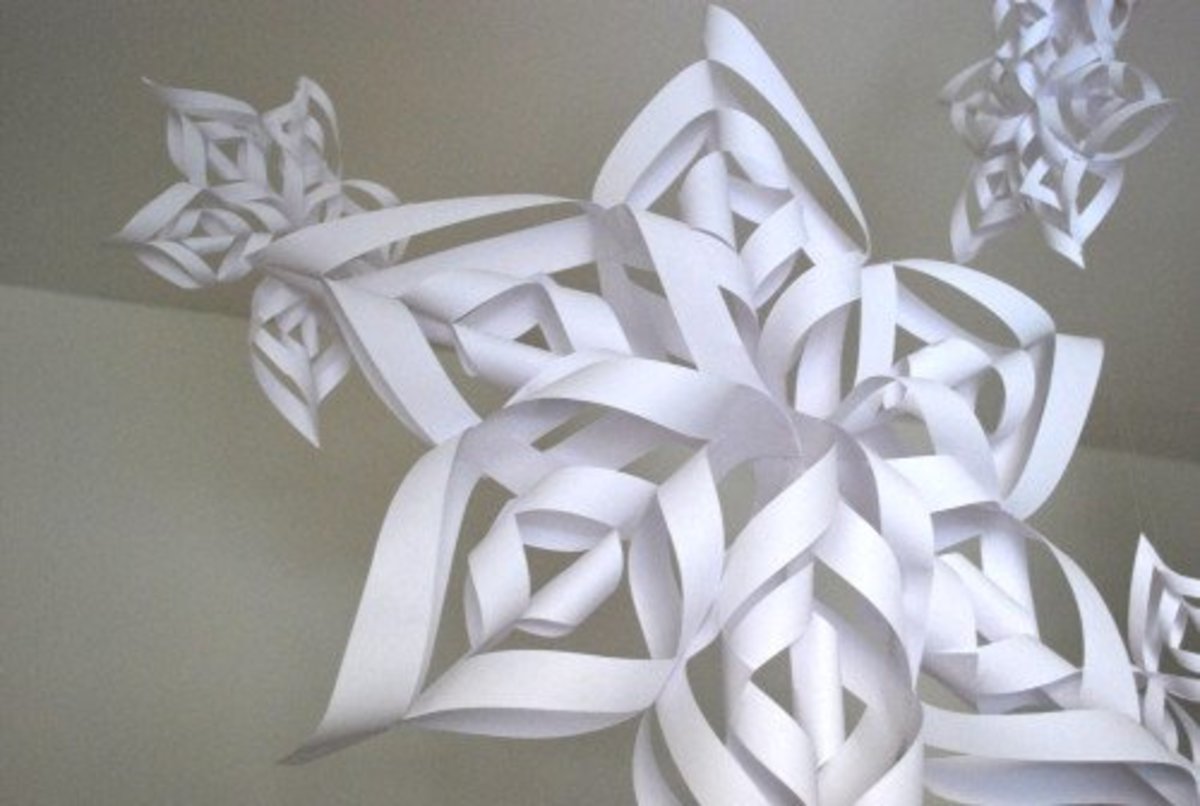
Easy to make 3-Dimensional paper snowflakes look beautiful hanging on a wall or in a window. They are fun for kids or adults.http://www.handimania.com/diy/3d.
3D Paper Snowflakes DIY YouTube
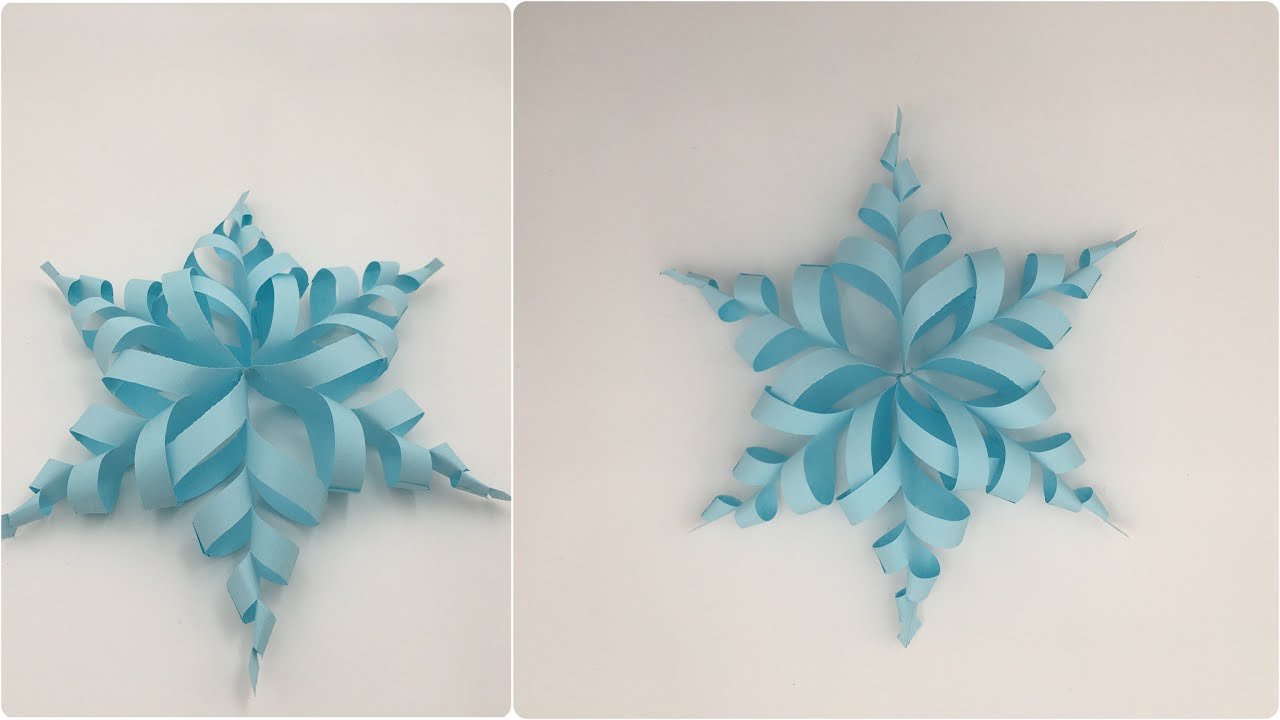
Instructions: Fold the paper diagonally. Cut off the excess paper at the bottom. . Fold the paper in half. Fold the paper in thirds. Flatten out the top of your paper by cutting off points. Draw a.
3D Paper Snowflake Tutorial. YouTube
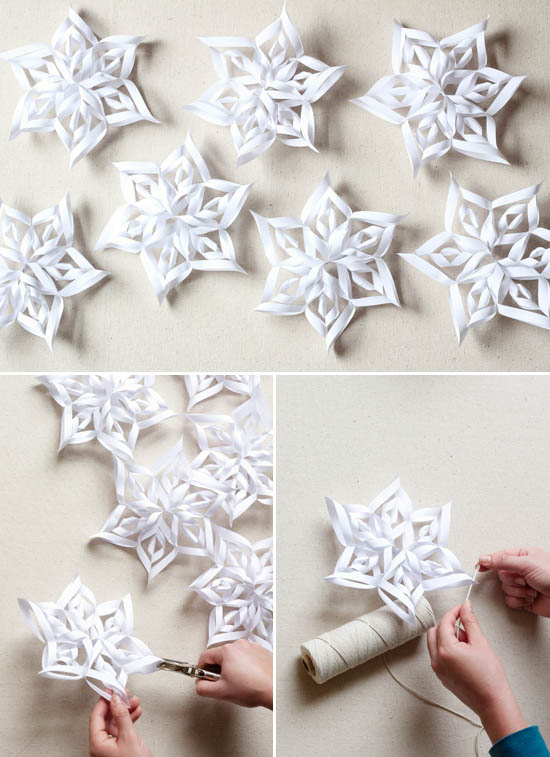
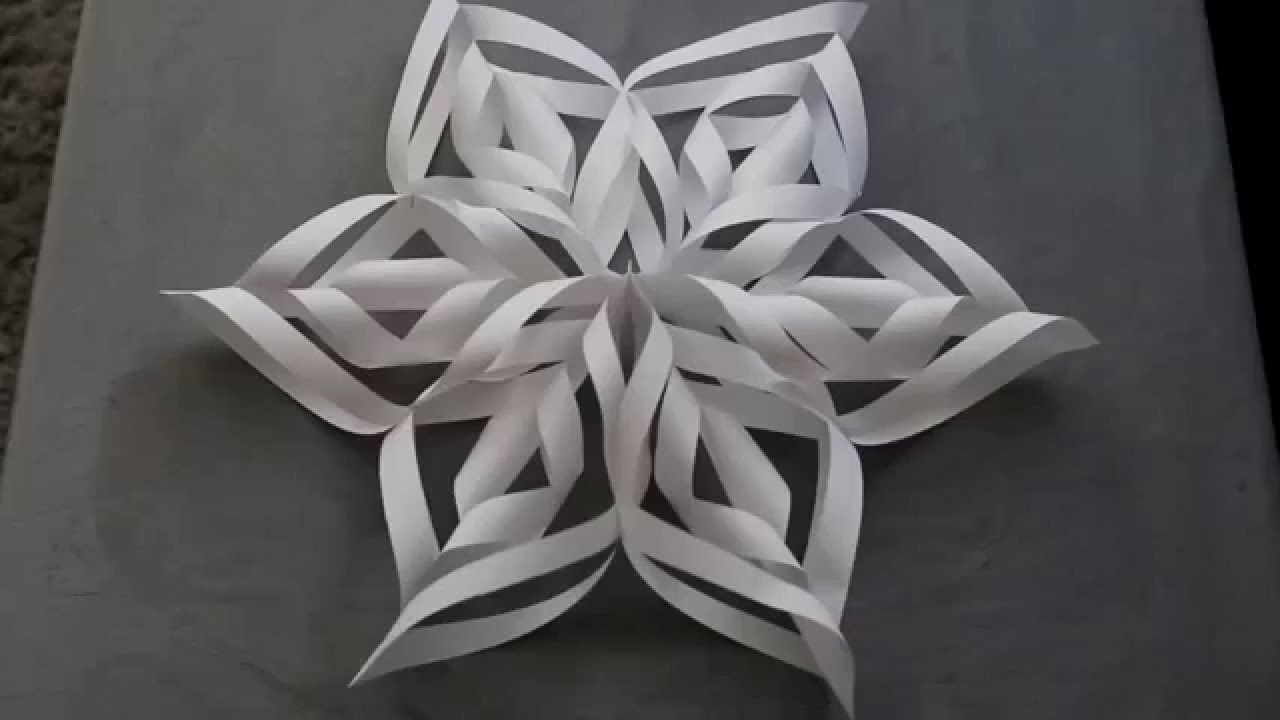
9, Stick the 2 3-pieces together at the centre. Then to pull it into a snowflake shape, stick or staple the middle of each piece (ie the fattest parts) to the adjacent piece middle part. 10, Hang and enjoy. You can vary these by colour, size and texture. You could even spray them, add glitter or decorate with sticky jewels.

How to make Beautiful 3D SnowFlakes Origami Very Easy Tutorial DIY
To make a 3D paper snowflake, you'll need 6 square pieces of paper that are all the same size, scissors, and clear tape. To get started, fold one of the squares in half diagonally so it's a triangle. Then, fold the triangle in half so you're left with a smaller triangle. Use your scissors to cut 3 evenly-spaced vertical slits along one of.
How to make a 3D Paper Snowflake (Easy Tutorial!) Party Ideas for
These 3-Dimensional Snowflakes are the perfect craft to make for Winter time. Watch how Jennifer creates these beautiful DIY decorations using fabric and Heat n' Bond from Shabby Fabrics as.
how to make 3d snowflakes out of paper step by step YouTube
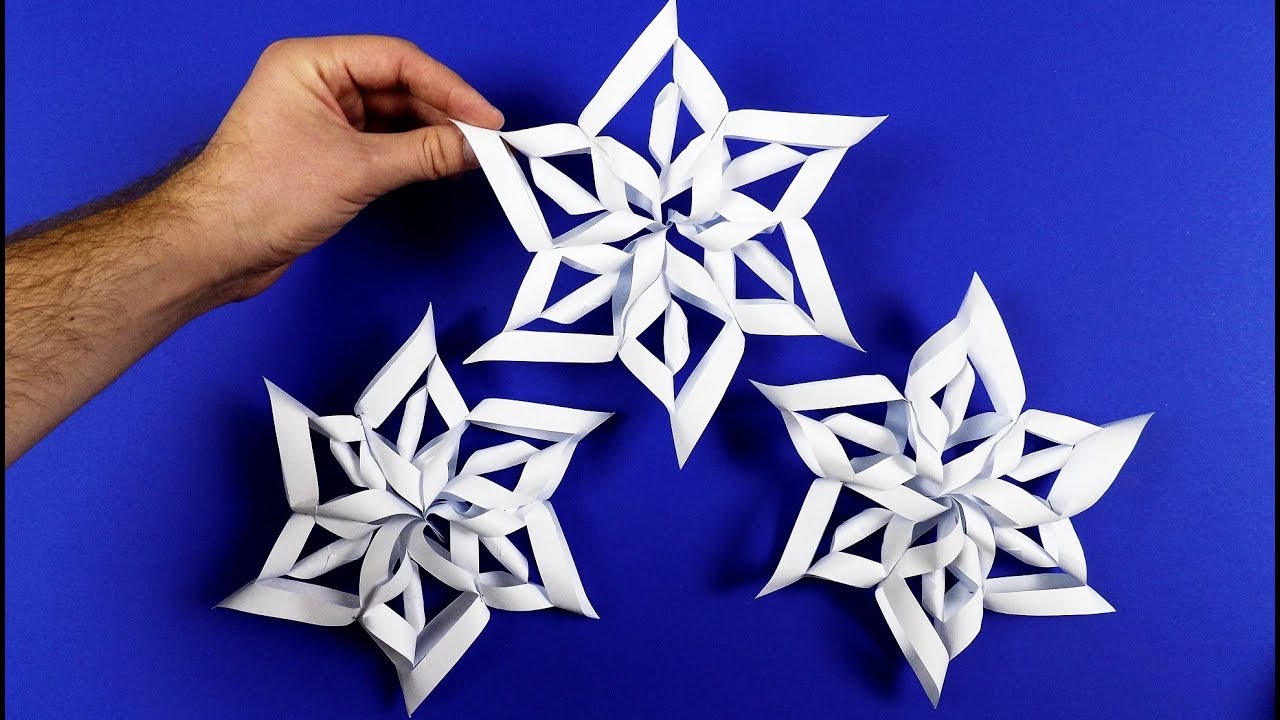
These 3D Paper Snowflakes can be created using a Cricut or Silhouette Cameo cutting machine. The files (6 Snowflake Designs) are available for purchase as a digital download. If you have any questions about your purchase, you can email me at [email protected]. Visit the SVG Shop to see other fun 3D Paper Projects.
Make Your 3D Paper Snowflakes in 4 Simple Steps. Video Tutorial
Then snip off the excess paper. You can keep the excess paper to make smaller snowflakes. 2. Fold the paper in half again to make a smaller triangle. 3. On the non-folded shorter edge, make three, evenly-spaced parallel cuts but stopping a couple of cm short of the folded edge.

How to Make a 3D Paper Snowflake 12 Steps (with Pictures) Paper
You will need a simple white A4 sheet, pencil, Scissor, Glue and a thread to hang it for these 3D Snowflakes. If you already know how to make paper snowflakes, it will be a very easy craft.

DIY 3D Snowflake Making Tutorial DIY Crafts YouTube
Step 3: Opening and Taping. Unfold your triangle. Starting from the inside at the square, bend the pieces of paper to form what looks like a canoli and tape. Flip your paper over and to do the same to the next strips. Continue flipping and taping until now strips remain.